Showing posts with label Organic Recipes. Show all posts

Wednesday, April 13, 2016

Healthiest Baked Blooming Onion & Dipping Sauce


This recipe for a baked blooming onion is healthier than the deep fried version of the classic blooming onion. The panko made this blooming onion crispy, flavorful, and made for a really fun appetizer.  Definitely a timeless treat, made all the better when it’s not loaded so many calories and unhealthy ingredients.


Ingredients:

BLOOMING ONION:
1 large organic Vidalia onion (or any yellow onion)
2/3 cup organic Panko crumbs or organic bread crumbs
1/4 tsp. sea salt
1 Tbsp. cajun seasoning (optional)
2 organic ( free range) eggs

DIPPING SAUCE:
1/2 cup organic sourcream
2 Tbsp. organic ketchup
2 tsp. organic horseradish sauce
1/4 tsp. sea salt
1/4 tsp. organic paprika
1/8 tsp. organic garlic powder
1/8 tsp. organic oregano flakes


Directions:

THE BLOOMING ONION:
Preheat oven to 400 degrees.

On a cutting board, use a knife to cut off the top (not the root) 1/4-inch of the onion until a few of the inside layers are exposed. Peel the outermost layer of the onion down to the root, but leave the root intact.

Lay the onion on the cutting board so that the flat side (that you just cut) is facing downward. Then use a knife to section the onion into 16ths, beginning with your knife 1/8-inch away from the root and cutting straight down. Once all cuts are complete, turn the onion over and set on a piece of parchment paper on a baking sheet. Then use your fingers to gently spread apart the petals. If any of your cuts did not go all the way through, you can use a paring knife to be sure that the entire onion is cut into 16ths.

In a separate small bowl, whisk together the Panko, cajun seasoning and sea salt until combined.

In a separate (additional) bowl, whisk the eggs until combined.

Beginning with the lowest (bottom) layers of the onion, brush the top of each petal with the egg mixture until coated, then immediately sprinkle with the Panko mixture. Repeat until all petals are coated.

Carefully form a tent with aluminum foil over the baking sheet until the onion is completely enclosed. Bake for 5 minutes, then remove tent and bake for an additional 10-15 minutes until the onion is soft and the tips are lightly crisped.

Remove and serve with desired sauces.


TIP:  Soak your sliced onion in cold water overnight, it will open up naturally on its own.


Other dipping sauces:
Honey Mustard
Ranch


Enjoy!
Laurel xoxo


Thursday, January 21, 2016

Portobello Mushroom Stroganoff


In the winter, all I want to do is make a one dish comfort food that is easy to prepare. This is a vegetarian take on classic beef stroganoff with a light creamy pasta packed with portabella mushrooms and full of flavor.

The savory and meaty flavor of the mushrooms is really brought out by the use of red wine, as well as the addition of Tamari and a little bit of Worcestershire, which add great depth.

Plain Greek yogurt adds a bit of creaminess, but you could certainly go with sour cream instead and the sauce will thicken up as it cools down.


Ingredients:

8 ounces uncooked organic fettuccine or egg noodles
2 tablespoons organic olive oil
1 medium organic onion, diced
2 cloves organic garlic, minced
1 lb organic portabella mushrooms (sliced)
3 tablespoons organic all-purpose flour
1/2 cup red wine
1 1/2 cups organic vegetable broth
2 teaspoons organic Tamari or soy sauce
1 teaspoon organic worcestershire sauce
1/2 teaspoon sea salt
1/2 teaspoon organic paprika
1/4 teaspoon organic pepper
1/2 cup plain organic Greek yogurt (or sour cream)
2 tablespoons minced fresh organic parsley

Directions:
  1. Bring a large pot of lightly salted water to a boil. Add the pasta and cook until al dente, according to the package directions. Drain and set aside.
  2. Meanwhile, add the olive oil to a large skillet set over medium heat. When hot, add the onion and cook, stirring occasionally, until it starts to soften, about 2 minutes. Add the garlic and cook for 30 seconds, until fragrant. Add the mushrooms and cook until they're tender and have released most of their juices, 5 to 7 minutes. Sprinkle in the flour and cook, stirring constantly, for 2 minutes. Slowly pour in the red wine, stirring the entire time. Cook, stirring frequently, until most of the wine has evaporated, 2 to 3 minutes.
  3. Add the broth, Tamari, Worcestershire, salt, paprika and pepper. Increase the heat to medium high and bring the mixture almost to a boil. Turn the heat down slightly and let the mixture continue to simmer, stirring occasionally, until it thickens, 5 to 7 minutes. Turn off the heat. Stir in the Greek yogurt.
  4. Add the drained pasta to the skillet with the sauce and toss to combine. If desired, let stand for about 5 minutes before serving (the sauce will thicken even more). Garnish with the fresh parsley and serve with salad.


Enjoy!
Laurel xoxo


Sunday, January 17, 2016

Moist Dark Chocolate Coconut Candy Bites


Moist Dark Chocolate Coconut Candy Bites
Serves: 18

Ingredients:
2 cups organic coconut
4 tablespoons raw honey
5 tablespoons  organic coconut oil
1 teaspoon  organic vanilla
4 ounces organic dark chocolate (melted)

Directions:
  1. Pulse the coconut in a blender or food processor until the texture becomes like thick flour. Transfer to a bowl and add the honey, coconut oil, and vanilla. Stir until a thick paste forms.
  2. Using your hands, squeeze the mixture into small balls. Place the coconut balls in the refrigerator for about 30 minutes or until firm. 
  3. Melt the chocolate slowly and gently until smooth and spreadable. 
  4. Lay out a sheet of  parchment paper. Roll each coconut ball in the chocolate until completely covered. Scoop the ball out with a spoon and let the extra chocolate drizzle off. Place the chocolate covered ball on parchment paper and chill until the chocolate has hardened. Store in the refrigerator.


**It's very important to use coconut oil because other oils won't harden like coconut oil, and that hardening is what holds the shape together.


Enjoy!
Laurel xoxo


Saturday, July 11, 2015

Organic Fruit Punch Recipe for Hot Summer Days


This Organic Fruit Punch is the perfect summertime beverage with strawberries, pineapple and lemon & lime juice. Serve it on hot summer days for parties and barbecues or just for family get togethers. This punch is refreshing and healthy too!

Ingredients

1 3/4 cups frozen organic strawberries
1/2 cup frozen organic pineapple
2 lbs  organic lemon juice (fresh squeezed)
2 Tbs  organic lime juice (fresh squeezed)
6 Tbs organic raw agave or organic sucanat
1 3/4 cups spring water
3 organic mint leaves


Directions:

In a blender, add strawberries, pineapple, lime juice, lemon juice, and water.

Blend on medium speed for 30-45 seconds, then increase speed to high for approximately 1-2 minutes or until all ingredients are well-blended. Strain to remove any seeds from the juice. Once strained, add the organic raw agave or organic sucanat until well blended.

Pour juice in individual cups or a pitcher with ice. Garnish with the mint leaves.

**Instantly turn this drink into a fresh fun cocktail to enjoy with friends and family at your next barbeque or party by adding 5 ounces of vodka.  


Enjoy!
Laurel  xoxo

Monday, May 25, 2015

Memorial Day Cooking


What is Memorial Day?

Memorial Day arose out of appreciation for and remembrance of all who gave their lives defending our nation.  Although the holiday was officially proclaimed in 1868 by General John Logan, many towns and communities decorated the graves of American soldiers and gathered to honor our nation's heroes well before Memorial Day was officially declared.  God Bless All of Our Soldiers That Gave Us Our Freedom!


Here are a few recipes you can make today or all summer ~


Homemade Honey BBQ Sauce

Whatever you happen to be grilling - hamburger, steak, chicken or ribs, try this delicious homemade barbecue sauce and add your own special ingredients to it.  There are so many ways to make barbecue sauce, but I'm just providing you with one that doesn't contain loads of sugar and it's easy to make.

Ingredients:

15 oz organic tomato sauce
1 cup spring water
1/2 cup apple cider vinegar
1/3 cup raw honey
1 T lemon juice
2 tsp garlic powder
1 1/2 tsp ground black pepper
1 1/2 tsp ground mustard
1 tsp paprika


Directions:
Combine all the ingredients in a medium saucepan over medium-high heat.  Stir to combine.  Bring to a boil, reduce heat and simmer for 1 hour.  Season with your own ingredients to taste.  Makes 1 1/2 cups.


Watermelon Lemonade with Fresh Mint

Who does not love a glass of lemonade on a hot summer day? This recipe is naturally sweetened by the watermelon so you do not need as much sugar to balance with the lemon juice as you will find in other lemonades. All you need is half a watermelon, 4 lemons, a pint of raspberries, fresh mint, spring water and a little cane sugar. If your watermelon is ripe enough, you may not need any sugar!

Ingredients:
6 cups watermelon cubes (seeds removed)
¼ cup fresh organic raspberries
1 cup spring water
1/3 cup raw honey (optional)
½ cup fresh lemon juice
Fresh mint to garnish

Watermelon slices to garnish

Directions:
Place watermelon, raspberries and water in container of food processor and blend until smooth. Strain through fine sieve into pitcher. Stir in sugar and lemon juice and continue stirring until sugar dissolves. Refrigerate until chilled, about 1 hour. Yield: 4 servings


Patriotic Pound Cake

An easy finale to your barbecue meal is this rich and buttery pound cake.  Serve it with fresh organic blueberries, strawberries and whipped cream and you'll have the perfect Patriotic Pound Cake.  It's so good, you may want to double the recipe for a large family gathering.

Ingredients:

3/4 cup unsalted butter (softened)
1 1/2 cups organic cane sugar
3 large eggs
2 tsps pure vanilla extract
1 1/2 cups organic unbleached flour
1/4 tsp baking soda
pinch sea salt
1/2 cup organic sour cream

Directions:


Position a rack in the lowest third of the oven and preheat to 300 degrees.  Butter a 9 x 5-inch loaf pan; set aside.

Place the butter and sugar in a medium bowl and beat with a mixer until smooth.  Add the eggs, one at a time, beating until the mixture is light and fluffy.  Add the vanilla extract.

In a medium bowl, whisk together the flour, baking soda and salt.  Add the dry ingredients to the batter on low speed in two additions, alternating with the sour cream.

Spoon the batter into the loaf pan and bake until the cake is set and a toothpick inserted into the middle of the cake comes out clean, 75-85 minutes.  Remove from oven and cool.

Cut into slices and add fresh cut strawberries and blueberries.  Top with a dollop of organic whipped cream.


Tuesday, May 5, 2015

Celebrate Cinco de Mayo with 3 Popular Mexican-American Recipes!

http://healthyintuitions.blogspot.com

HAPPY CINCO De MAYO !


Cinco de Mayo, the day Mexico celebrates its victory over France in the Battle of Puebla in 1862.  This holiday is extremely popular in the US with Mexican-American citizens who celebrate with parades, parties and an array of Mexican foods.

Satisfy your cravings with three of my favorite Mexican-American recipes to celebrate this day.  


GUACAMOLE


Ingredients: Always organic!

 * 3 avocados - peeled and pitted
 * 2 T. lime juice 
 * 1/2 tsp. sea salt
 * 1/2 cup diced onion 
 * 3 T. chopped fresh cilantro
 * 2 roma (plum) tomatoes, diced
 * 1 tsp. minced garlic 
 * 1 pinch ground cayenne pepper


Directions:

For smooth Guacamole -
1) Add all the ingredients to blender, except the onion and tomatoes, and process until smooth.  Then mix in the onion and tomato.

For chunky Guacamole -
1) In a medium bowl, mash the avocados with a fork and add the remaining ingredients.

Refrigerate for 1 hour for the best flavor or serve immediately with taco chips.  Serves 4.


MEXICAN CHICKEN & BEAN CASSEROLE


Ingredients:

* 1 lb. chicken ( I use Bare), cooked and shredded
* 2 (16 oz) cans black beans, drained
* 1 (16 oz) can corn, drained
* 1 (8 oz) can tomato sauce
* 1 cup salsa 
* 1 cup red onion, chopped 
* 1 green pepper, diced
* 1/4 cup chopped cilantro 
* 1 T. minced garlic 
* sea salt and pepper
* 12 oz shredded cheese

Directions:

1) Preheat oven to 350 degrees.

2) Combine the chicken, beans, corn, tomato sauce, salsa, onion, bell pepper, cilantro, garlic, sea salt and pepper in a bowl.

3) Place half the mixture in a 13 x 9 inch baking dish and sprinkle with half the cheese.

4) Add the remaining chicken mixture and sprinkle with t6he rest of the cheese.

5) Bake for 30 minutes and let stand for 5 minutes before serving.

*Add tomato or cilantro as a garnish on the side -


Enjoy a delicious fresh strawberry margarita smoothie after your dinner & have one for me!

FRESH STRAWBERRY MARGARITA SMOOTHIE

Ingredients:

* 2 oz tequila 
* 1 oz triple sec
* 3 oz lime juice 
* 1/2 cup fresh organic strawberries (trimmed)
* Raw honey ( about 1/2 T. to sweeten) - optional
* 1/2 cup crushed ice
* salt or sugar rim of glass

Preparation:
* Puree in blender until smooth and garnish with a fresh strawberry on the rim.


Have a safe and healthy Cinco de Mayo!

Laurel ♥

Wednesday, April 8, 2015

Fat Flush Water & How It Works


You may have heard some of the hype about “Fat Flush Water.” But how exactly does water flush fat out of your system? Clearly, water is not some kind of magic diet supplement. Your body needs enough water everyday to keep hydrated and cleanse itself of unwanted materials. Fat deposits that form on the body can be tough to break down and eliminate, but proper nutrition and exercise can help greatly with this.

Fat is broken down when the body uses its fat deposits to produce energy, the triglycerides in the fat cells are removed. Then, these are broken down into fatty acids and glycerols and are then absorbed into your muscle tissue and internal organs where they are then broken down even further through various chemical processes. If the products leftover from these chemical processes are not used by the body as energy, they are then considered waste products and need to be removed from the body. This is where the role of water comes in.

Water is the vehicle used to remove these waste products from the body. The leftover materials from the fat breakdown are then filtered out of your organs by the water that you drink. The water carries the waste to your bladder where it is then expelled from your body through your urine. It is important to drink enough water each day to keep you hydrated and facilitate the breakdown and elimination of fat cells. 

Many sources claim that you should be consuming around 8 glasses of water per day, but this number can largely vary depending on your size, how often you are exercising and even how hot it is outside. Try and keep drinking water consistently throughout the day and consider water before soda, fruit juices or other sugary drinks as these can actually dehydrate your body even more. Often a lack of energy and even headaches throughout the day are simply caused by mild dehydration. It is a good idea to make a conscious effort to drink more water. A little extra is definitely better than not enough!

The Fat Flush Water Recipe -And How It Works

2 Liters (64 oz.) Spring Water

1 Organic Tangerine, sectioned

1/2  Organic Grapefruit, sliced

1  Organic Cucumber, sliced

4 Organic Peppermint leaves

Ice, (made from spring water)

Mix in a pitcher before bed and drink throughout the entire next day. Please consider using organic produce for this, if it is unavailable to you, thoroughly wash the produce before adding it to the water.

The tangerine increases your sensitivity to insulin, stabilizes blood sugar and because they are high in vitamin C, you increase the fat burning during exercise 

  • Tangerine increases your sensitivity to insulin, stabilizes blood sugar, and stimulates genes to burn fat.
  • The grapefruit will increase metabolic energy, burn fat and increase energy
  • The cucumber helps you to feel more full, and acts is a natural diuretic which means less bloating and water retention
  • The mint leaves aid in digestion

This is considered a fat flush, meaning that you will still need to do the exercise that is required to break down the fat, so that it can then be eliminated by the body. Proper nutrition also plays a huge role, its not about restricting calories, but making sure to get enough calories for your body from healthy, lean, whole foods. At the very least, this tasty water recipe will give you some added nutrients throughout the day, and help to ensure that you are drinking enough water. 

Enjoy!
Laurel ♥

Monday, November 10, 2014

Organic Homemade Peanut Butter Cups


These homemade peanut butter cups are not only lower in sugar and free of highly-processed ingredients, they also taste better than the original store-bought versions!

Ingredients
  • 2 tablespoons organic peanut butter
  • 2 teaspoons organic grass-fed butter
  • pinch of sea salt
  • ½ cup organic dark chocolate chips (I used Green and Black's 70% dark chocolate)

Directions:
To get started, melt the dark chocolate then use a spoon to drop a small amount of melted chocolate into the bottom of 6 mini paper cups. (I recommend double-layering the paper cups, for sturdiness.)

Using the spoon, push the melted chocolate up the sides of the paper cups a bit, to create the "cups" that will hold the peanut butter filling. Place the chocolate-filled shells in the freezer to set, about 10 minutes.

In the meantime, mix up the peanut butter filling. Combine the peanut butter, butter and salt, and stir until smooth and creamy. Remove the paper cups from the freezer, and place a dollop of the peanut butter filling in the middle of each chocolate shell (about a teaspoon per center). Be sure to leave a little room around the edges, for the chocolate filling to cover the sides!

Cover each cup with a final layer of melted chocolate, and return to the freezer to set for at least 2 hours before serving.

Remove the paper cups, and enjoy these chocolate candies whenever you like! For best texture, I recommend storing in the fridge or freezer until ready to serve.

Note: As always, feel free to use any other nut butter instead of peanut butter, if you prefer. For those with nut allergies, sunflower seed butter is a great nut-free alternative!
—

Laurel xoxo


Wednesday, October 8, 2014

Baked Mushroom Vegetable Lasagna

Welcome to Healthy Intuitions! Please add your comments and suggestions. Thank you!


One of my favorite go-to recipes for winter used to be my homemade lasagna with hamburger, but now I prefer a healthier vegetable lasagna using whole grain lasagna noodles instead of white, and adding more veggies to increase the nutritional value. I was able to make it much healthier than traditional versions adding fresh spinach and mushrooms, and it's a great, hearty, one-dish meal.

Ingredients:

2 tablespoons organic virgin olive oil
1 large red onion, sliced
1 pound organic portobello mushroom caps, sliced
4 garlic cloves, minced
2 packages (5 oz each) fresh baby spinach
2 large eggs, lightly beaten
1/3 cup chopped fresh basil
1 tablespoon dried oregano
1/4 teaspoon freshly ground black pepper
1/4 cup organic milk
1-15 oz container organic ricotta cheese
2 -15 oz cans organic tomato sauce
16 organic whole grain lasagna noodles (pre-cooked)
8 ounces part-skim organic mozzarella cheese, shredded (about 2 cups)


Directions:

1. Preheat oven to 375°.

2. Heat a large skillet over medium-high heat. Add oil to pan; swirl to coat. Add onion; sauté 2 minutes. Add mushrooms; sauté 6 minutes. Add garlic and spinach; sauté 30 seconds. Transfer mushroom mixture to a bowl.

3. Stir vegetable mixture until blended.

4. Combine eggs and next 3 ingredients (through pepper) in a bowl, stirring with a whisk. Stir in milk and ricotta cheese.

5. Pour 1 cup tomato sauce into bottom of a 13 x 9-inch glass or ceramic baking dish coated with olive oil Arrange 4 lasagna noodles over sauce. Top with one-third of ricotta mixture, one-third of vegetable mixture, and 1/3 cup mozzarella cheese. Repeat layers twice with sauce, noodles, ricotta mixture, vegetable mixture, and mozzarella cheese. Spread 1 cup sauce over mozzarella. Arrange 4 noodles over sauce. Top with 1 cup sauce and 1 cup mozzarella cheese.

6. Bake uncovered for 40-50 minutes, or until the cheese is lightly browned and the sauce is bubbling around the sides.

This is important – let the lasagna stand for at least 10 minutes before cutting and serving.  That will allow the cheese to cool enough to hold the shape when cut, which makes a much more impressive presentation, rather than having it fall apart on your plate.


"Lasagne by Laurel"  

Tuesday, October 7, 2014

Chewy Delicious Coconut Macaroons

Welcome to Healthy Intuitions! Please add your comments and suggestions. Thank you!


Last Friday night on Yom Kippur (The Jewish New Year), I was invited to my cousin Cindy's house for dinner. Needless to say, the dinner buffet was delicious!  After dinner, a huge plate of dessert goodies were placed at our table and I couldn't resist the monster sized coconut macaroons dipped partially in dark chocolate!  I'm not usually a fan of macaroons, but these were decadent and an absolute guaranteed delight. My cousin told me that all the desserts were from Wuollet bakery of Minneapolis, a family bakery that has been in business since 1944. Wuollet bakery is famous for the best cakes and pastries in town.  

After a few days passed, I began craving a coconut macaroon dipped in chocolate, so I thought I'd make my own and try to come up with a recipe that tasted similar to the delicious bakery macaroons.  I ended up with chewy coconut macaroons made with raw honey and dipped in organic dark chocolate.

This is the healthiest recipe for coconut macaroons and they're delicious - chewy on the inside, crispy on the edges.  Maybe not exactly Wuollet quality, but a close second!

Ingredients:

2 c. organic unsweetened, finely shredded coconut
2 large eggs
2 t. pure vanilla extract
½ c. raw pure honey
1 (3.5 oz) bar of Green & Black's organic 70% Dark Chocolate

Directions:

1. Preheat the oven to 350 degrees F.  Butter a baking sheet and set aside.

2. In a large mixing bowl, combine all of the ingredients for the macaroons until a sticky dough begins to form.

3. Drop the dough by a rounded tablespoon onto the prepared baking sheet.

4. Using the back of a spoon, gently press onto the top of the macaroon, making a slight “well” on the top.

5. Bake for 17- 18 minutes or until lightly golden around the edges.

6. Let the macaroons cool for 2 minutes on the baking sheet and then transfer to a wire rack to cool completely.

7. Cut up the chocolate bar and melt over low heat or melt in the microwave.

8. Dip the bottom of each macaroon in the melted dark chocolate; use either dark (70%) chocolate, milk chocolate or white chocolate.

9. Dip each cookie half-way in the chocolate, or drizzle chocolate on top. Let cool on a piece of waxed paper until the chocolate is solid.

10. Consume at room temperature, and if there's any left, refrigerate! You can also freeze these in an airtight container for up to two months.


Mmmm - Enjoy!


Intuitively Yours,
Laurel  ♥

Monday, October 6, 2014

Healthy Recipes for The Winter Blues - SAD

Welcome to Healthy Intuitions! Please add your comments and suggestions. Thank you!


Calorie-dense foods may help IMPROVE mood and alleviate anxiety or stress - Comfort foods are generally sweet, fatty and calorie-dense, which may help temporarily IMPROVE mood and alleviate anxiety or stress.

Soups and stews are a terrific idea in the winter, as long as they are not cream-based or loaded with high-fat meat. Both generally have a lower calorie density because they are higher in water than many foods. And you can sneak vegetables into a savory winter soup or stew if plain or raw vegetables don't appeal to you during the colder months.


Many of you may be affected this time of year by the winter blues or by seasonal depression (Seasonal Affective Disorder – SAD). Studies show that people who are affected by SAD don’t have enough vitamin D and have lower level of tryptophan. For some reason more women than men suffer from this disorder.


Here are some great recipes for the winter blues to help with seasonal depression: 

Healthy Baked Salmon Recipe with Mushrooms

Ingredients:

2 medium onions, sliced
4-6 pieces of wild Alaskan sockeye salmon
4 Portobello mushrooms, sliced
1 tbsp fresh parsley, chopped
1 tbsp fresh dill
one lemon
Sea salt and pepper

Directions:

Preheat oven to 350 degrees. Put a layer of onions (half) on the bottom of a casserole, then put fish, then put mushrooms and the rest of onions on the top. Put parsley on top, and squeeze the lemon juice over all. Cover and bake for 30 minutes, or until the fish is ready in the middle (test with a fork.). Serve with lemon wedges.


Healthy Avocado Salad Recipe

Ingredients:

3 avocados, diced
½ cup organic carrots, chopped
½ cup purple cabbage, diced small
1 clove garlic, minced
1 tbsp parsley, minced
1 tbsp dill chopped
2 tbsp sesame seeds
2 tbsp sesame oil
Juice of 1 lemon
1 pinch of Cayenne pepper
black pepper and sea salt to taste

Directions:

Mix all ingredients in a bowl thoroughly.


Energy Boosting Curried Cauliflower Vegetable Soup Recipe

Ingredients:

2 tsp olive oil
1 large onion, chopped
2 medium carrots, sliced 1⁄4 in. thick
2 tbsp curry powder
2 cloves garlic, minced
31⁄2 cups organic vegetable broth
21⁄2 cups spring water
2 organic medium potatoes (8 oz), cut in 1⁄2-in. pieces
3 cups frozen organic cauliflower florets
1 can organic (15.5 oz) chickpeas, rinsed
1⁄2 cup organic frozen cut-leaf spinach
Serve with: organic plain yogurt or sour cream

Directions:

Heat oil in large saucepan over medium-high heat. Add onions and carrots; cook 4 minutes or until onions are golden and just tender.

Stir in curry powder and garlic; cook 30 seconds or until fragrant. Stir in remaining ingredients; cook, covered, 15 minutes or until vegetables are tender.

Mood Boosting Split Pea Soup Recipe

Ingredients:
1 lb  organic dried green split peas
2 cups diced onions
1 1⁄2 cups diced carrots
1 cup diced celery
2 tsp minced garlic
1⁄2 tsp pepper
3 chicken bouillon cubes
11⁄4 lb Nitrate free ham

Directions:

Put all ingredients and 7 cups spring water in a 51⁄2-qt or larger slow-cooker. Cover and cook on high 6 hours or low 12 hours until peas are very soft and fall apart. Remove ham. When cool enough to handle, cut meat off the bone, dice and return to soups. Serve with organic cornbread, or cut cornbread in cubes, toast in oven and serve as croutons.


Winter Fiesta Soup

2 tablespoons organic olive oil
1 onion chopped
1 medium organic carrot, diced
2 cloves minced garlic
1 tablespoon chili powder
1 tablespoon ground cumin
2 bay leaves
4 to 6 cups organic vegetable stock
24 ounces organic frozen diced plum tomatoes
12 ounces organic frozen diced mixed peppers
16 ounces organic frozen sweet corn
2 cups cooked organic black beans
Sea salt and fresh ground pepper

Directions:

In a large soup pot, HEAT OIL over medium heat. Saute onions and carrots until tender. Add garlic and continue to saute until golden. Add the vegetable stock and spices and bring to a boil. Add the frozen tomatoes and frozen peppers and sweet corn. Simmer until the vegetables have defrosted. Add the beans and simmer another ten minutes. Remove the bay leaf before serving. Season to taste.


Bon Appetit!


Intuitively Yours,
Laurel ♥

Wednesday, September 24, 2014

Winter Squash & Chicken Tzimmes

Welcome to Healthy Intuitions! Please add your comments and suggestions.

                                                               Happy Rosh Hashanah!


Fresh orange juice and cinnamon infuse this winter squash and chicken stew. Tzimmes (pronounced "tsim-iss") can also be made with brisket and is served during the Jewish New Year. A fairly SWEET DISH, it's said to offer wishes for a sweet year ahead.

Ingredients:

1 cup small ORGANIC pitted prunes
3 cloves garlic, minced
2 medium shallots, thinly sliced and separated into rings
1 teaspoon ground CEYLON cinnamon
1 teaspoon dried, oregano
1 teaspoon dried thyme
1 teaspoon sea salt, divided
1/2 teaspoon freshly ground pepper
8 skinless, bone-in chicken thighs, (about 3 1/2 pounds), trimmed
1 cup organic chicken broth, or vegetable broth
1 teaspoon freshly grated orange zest
1/2 cup fresh ORGANIC orange juice


Directions:

Preheat oven to 350°F.

Place squash, prunes, garlic, shallots, cinnamon, oregano, thyme, 1/2 teaspoon salt and pepper in a large bowl and mix well. Transfer to a 9-by-13-inch baking dish. Sprinkle chicken with the remaining 1/2 teaspoon salt and place on top of the vegetables. Mix broth, orange zest and juice in a small bowl and pour over the chicken. Cover the baking dish with foil.

Bake for 40 minutes. Uncover and continue baking until the vegetables are tender and the chicken is cooked through, basting often, about 1 hour more. A fairly sweet dish, it's said to offer wishes for a sweet year ahead. Makes 8 servings


Shana Tovah everybody! Wishing you all a beautiful year!


Intuitively Yours,
Laurel  ♥

Tuesday, September 23, 2014

Organic Chia Seed Pudding

Welcome to Healthy Intuitions!


Chia seeds, a member of the mint family, are bursting with Omega-3 and Omega-6 essential fatty acids, fiber, and B vitamins, and contain protein and calcium.  To the Mayans and Aztecs, chia seeds were an endurance food.  Ancient Mayan and Aztec cultures treasured the tiny seeds. Their belief that chia, which comes from the Mayan word for "strength", embodied extraordinary powers has been confirmed by modern science. Today, research has also revealed their role in the regulation of blood sugar and blood pressure.

Yes! A couple decades ago, the popular Chia Pets sported these seeds to grow their green fur. Marketed as a novelty item, it was not commonly understood that chia seeds were edible. So, fast forward several years, there has been a bit of a stigma to overcome in terms of the general public seeing them as a food item. Although the Chia Pet tradition is still going strong, it is important to note that even though the seeds are essentially the same at the source, the cultivation, handling and production standards are far different for Chia Pet products than for consumable chia seed products. So eating Chia Pet or Chia Head product seeds is absolutely not recommended.


I bought a package of truRoots Organic Chia Seeds, which have a mild flavor and the seeds look like tiny black and white mixed pepper.  When you mix them with water, let stand for 10 minutes and stir with a fork until thick, it turns into a gel that you can easily blend into drinks or whatever you are preparing.

I have used organic chia seeds in juices, cereals and salads, but I was yearning to make an easy raw pudding to enjoy for dessert.

I played around with the ingredients, and I prefer 1 1/2 cups of coconut milk to 1/3 cup chia seed. You can make this pudding with milk, cream, almond milk, honey instead of maple syrup, etc.

This pudding has a mousse-like consistency and only takes a few minutes to mix together. I prefer to eat it at room temperature because when it’s chilled, the pudding becomes a tad too gelatinous. If you refrigerate the pudding, make sure to leave it out for about 15 minutes to take the chill off. It’s great with berries, a little whipped cream or chocolate shavings.


Vanilla Chia Seed Pudding

Ingredients:

1 1/2 cups coconut milk (I used organic canned coconut milk from Organic Thai Kitchen.
4 tablespoons maple syrup or honey
1 tablespoon vanilla extract

1/3 cup  organic chia seeds
1/2 cup fresh organic berries

Directions:

Whisk coconut milk, maple syrup, and vanilla extract until smooth. Stir in chia seeds. Divide mixture evenly between 4 glasses. Let sit at room temperature for 2 hours. Serve.

If you’d like to make the pudding ahead of time, cover tightly and chill in the refrigerator. Set pudding out for 15 minutes before serving. Best if eaten within 24 hours.


Chocolate Chia Seed Pudding


Ingredients:

1 1/2 cups organic coconut milk
4 tablespoons maple syrup or honey
2 tablespoons organic cacao powder

1 tablespoon vanilla extract

1/3 cup organic chia seeds
1/2 cup fresh organic berries

Directions:

Whisk coconut milk, maple syrup, cacao powder and vanilla extract until smooth. Stir in chia seeds. Divide mixture evenly between 4 glasses. Let sit at room temperature for 2 hours. Serve.

If you’d like to make the pudding ahead of time, cover tightly and chill in the refrigerator. Set pudding out for 15 minutes before serving. Best if eaten within 24 hours.


I haven't decided whether I like vanilla or chocolate chia seed pudding because they are both quite delicious. Try making it and see which one you prefer!


Intuitively Yours,
Laurel ♥

Sunday, September 14, 2014

Fall Comfort Foods - Healthy Game Day Chili


This time of year, we're craving comfort foods, hearty soups and easy, filling weeknight meals. Keep warm as the weather turns cooler with easy fall recipes made with favorite fall ingredients—pumpkin, apples, squash and more. The classic comfort foods like soup, chili and slow cooker recipes chase away the autumn chill.

There’s nothing like a giant pot of chili and a football game to really see that Fall is here!

This is my easy go-to healthy game day chili recipe. If you've been reading my blog a while, I'm sure you've probably noticed that I rarely eat beef. In fact, I think this is the first recipe that I've ever posted that contains beef. However, grass-fed beef is a whole food and is a great source of omega-3’s, protein and iron, which is okay every now and then. This recipe is dairy-free, but you can always top the chili with organic sour cream or cheese. When using canned food, always look for organic cans with BPA-free linings. I don’t drain and rinse the tomatoes, you want those juices, but I always drain and rinse canned beans to remove excess sodium.


A Few Tips:


  • Always try to use organic ingredients. 
  • I only buy organic grass-fed beef because I really do think it makes a difference in your health.
  • You can actually make this a day or two ahead. Just let it cool completely and keep it in the refrigerator. If you make it in a dutch oven just put the lid on and place the whole thing in the fridge. Otherwise, store it in a large air-tight container. Reheat over medium low heat on the day you plan to serve.


HEALTHY GAME DAY CHILI RECIPE

Ingredients:

1 pound organic grass-feed ground beef (omit for vegetarian chili)
1 yellow or white onion, chopped
1 carrot, grated or finely chopped
2-3 cloves garlic, pressed or grated
2 tablespoons chili powder
2 teaspoons ground cumin
1 bay leaf
2 cans organic tomato sauce
1 can organic diced tomatoes (or 2 large fresh tomatoes, diced)
2 cans organic black beans, drained and rinsed
1 can organic pinto beans, drained and rinsed
1 red bell pepper, chopped
1 jalapeño, chopped (optional)
Sea salt (about 2-3 teaspoons total for the whole pot)
Freshly ground course black pepper

Garnishes:
Sliced avocado
Chopped cilantro
Finely diced red onion
A few organic corn tortilla chips (my favorite is Way Better Snack brand)

Directions:

1. If using the beef, preheat a large dutch oven to high heat. Brown the meat for 2-3 minutes until slightly caramelized. Add a healthy pinch of sea salt and a sprinkle of black pepper and stir. Reduce the heat to medium. If making this chili vegan, skip to step 2.

2. Add the onion and carrot. Stir and cook until soft, 3-4 minutes. If not using meat, add about a tablespoon of olive oil to the pan first to sauté the onion & carrot. Add the pressed garlic, chili powder, cumin, bay leaf and pinch of sea salt, and stir for about 1 minute to cook the garlic and toast the spice. Reduce heat while cooking garlic if needed so it doesn't burn.

3. Back to medium heat, add the tomato sauce and diced tomatoes – the acid from the tomatoes will deglaze the bottom of the pan. Stir well scraping the bottom of the pan.

4. Add the beans and peppers plus 1 teaspoon of sea salt and 1/2 teaspoon black pepper. Stir well and cook for at least 5 minutes, then taste to check to see if you need more salt. I usually end up adding another teaspoon of sea salt, but depending on how much you used earlier and the other ingredients you may or may not need it. Don’t be afraid to salt your food! Salt brings out the flavor of all foods, and cooking from scratch won’t even come close to the sodium levels in processed foods. Add 1 cup of purified water to thin out your chili if it is too thick.

5. Let it simmer on low, stirring about every 15 minutes, for at least an hour if you can to let the flavors come together. The longer is sits the better the flavor. If you make it a few hours ahead, you can turn the heat on a covered dutch oven off for a few hours and it will stay hot. Just turn the heat back on a few minutes before you’re ready to serve. Or, keep it in a crockpot on the warm setting on your counter.

Store leftovers in a glass airtight container up to 3 days in the refrigerator, or freeze in freezer-safe bags or Pyrex up to 6 months.


Be your own chef! Add different veggies, beans, or spices that sound good to you. If you really love sour cream or cheese on your chili, I recommend Organic Valley sour cream or cheeses.


Intuitively Yours,
Laurel ♥


Thursday, September 11, 2014

Moist Sour Cream Bundt Coffee Cake


Laced and topped with a sweet pecan, brown sugar and cinnamon streusel, this sour cream coffee cake is moist, flavorful and scrumptious!  This bundt coffee cake so delicious in the morning with your favorite cup of coffee.  Try serving up a slice warm with a pat of butter on it...yummy!

Ingredients:
1-1/2 cups organic cane sugar
3/4 cup organic butter
1 tsp. vanilla
2  eggs
2 cups organic all-purpose flour
1 tsp. baking powder
1/2 tsp. baking soda
1 cup  organic sour cream

1 cup organic pecans
1/3 cup coconut palm sugar
1-1/2 tsp. ground ceylon cinnamon

Directions:
Preheat oven to 350 degrees. Beat the cane sugar, butter and vanilla in large bowl with mixer until light and fluffy. Add eggs, 1 at a time, beating well after each. Mix flour, baking powder and baking soda. Add to sugar mixture alternately with sour cream, beating after each addition until blended.

Combine nuts,coconut palm sugar and cinnamon; spoon half into a buttered 12-cup bundt cake pan or 10-inch tube pan; top with half the cake batter. Repeat layers.

Bake 55 min. to 1 hour or until toothpick inserted near center comes out clean. Cool 10 min. in pan. Loosen cake from sides of pan with knife. Invert cake onto wire rack; gently remove pan. Cool cake completely.
(24 servings)


Enjoy!


Intuitively Yours,
Laurel  ♥


Wednesday, August 27, 2014

Wild-Caught Salmon with Red Wine Mushroom Sauce


Of all the delicious fish out there, my absolute favorite is wild-caught salmon. Wild Salmon has become a meal which I prepare at least 2-3 times per week because of the many health benefits and because I simply just love the taste. It's amazing how many different ways you can prepare salmon. Perfectly cooked salmon is moist and has a delicate flavor. Cooking salmon is fast and healthy and can be baked, broiled, poached, grilled or pan-fried.

There are several species of Pacific wild-caught salmon including King Salmon which is sometimes called Chinook, Coho Salmon, also called Silver Salmon, Pink (or Humpback) Salmon (used mostly for canning), Sockeye Salmon, also known as Red Salmon, and Copper River Salmon, which could be Coho, Sockeye or King. I've tried them all but prefer Wild Sockeye salmon because of its delicious mild taste.

I've prepared numerous recipes for salmon for a variety of tasty choices. I recommend leaving the skin on when you cook salmon as it gives it more flavor and it's easier to remove once cooked.  If you prefer to cook the salmon without the skin, just ask your butcher to remove it  when you purchase a fillet of salmon.  It's free of charge and will save you the hassle of removing it yourself.

My recipe for Wild-Caught Salmon with Red Wine Sauce is especially one of my favorites because anything made with wine and mushrooms is delicious. I will definitely make this dish again!


Wild-Caught Salmon with Red Wine Mushroom Sauce


INGREDIENTS:

1 1/2-ounce package morel or porcini mushrooms
2 teaspoons arrowroot powder (or cornstarch)
2 teaspoons plus 1 tablespoon extra-virgin olive oil, divided
1/3 cup finely chopped shallots
3/4 cup dry red wine
1 cup  organic vegetable stock
1 teaspoon butter
1-2 teaspoons fresh lemon juice
1/2 teaspoon sea salt, divided
1/2 teaspoon freshly ground pepper, divided
1 1/4 pounds wild-caught salmon fillet, cut into 4 portions

PREPARATION:

Rinse the mushrooms; finely chop. Heat 2 teaspoons oil in a large skillet over medium heat. Add shallots and cook, stirring, until softened, about 2 minutes. Add the mushrooms and cook for 1 minute more.

Stir in wine and cook, stirring, until reduced to about 1/2 cup, 2 to 3 minutes. Add the vegetable stock to the pan. Bring to a simmer and cook until the sauce is reduced to 1 1/2 cups, 10 to 14 minutes.

Stir the cornstarch mixture and stir it into the simmering sauce. Cook, stirring, until slightly thickened, 1 to 2 minutes. Remove from the heat and stir in butter, lemon juice and 1/4 teaspoon each salt and pepper.

Meanwhile, season salmon with the remaining 1/4 teaspoon each salt and pepper. Heat the remaining 1 tablespoon oil in a large nonstick skillet over medium-high heat. Add the salmon and cook until just cooked through, 3 to 5 minutes per side. Serve with the mushroom sauce.

Add quinoa and steamed broccoli to make a complete meal. Makes: 4 servings

ENJOY!

Intuitively Yours,
Laurel  xoxo

Monday, August 25, 2014

Main-Course Broiled Halibut Salad


I have created a healthy delicious Halibut summer salad, a perfect dinner for these hot summer nights. I loved putting this together and thoroughly enjoyed it.  I hope you will too!


Broil 1 lb of Wild Pacific Halibut and boil new potatoes ahead of time and set aside. Or skip the fish altogether for a vegetarian salad.

Broiled Halibut Salad 
Makes: 6 servings

INGREDIENTS:

VINAIGRETTE
1 medium clove garlic
1/4 teaspoon  sea salt
5 tablespoons extra-virgin olive oil
6 tablespoons fresh orange juice, plus more to taste
1/4 cup white-wine vinegar or red-wine vinegar
1 tablespoon Dijon mustard

SALAD

1 1/4 pounds fresh green beans
Juice of 1 large lemon
2 tablespoons extra-virgin olive oil
1/2 teaspoon  sea salt, divided
1 pound Wild Pacific halibut  (broiled)
1/4 teaspoon coarsely ground pepper, to taste
8 oz fresh organic spinach
1 1/2 cups organic grape tomatoes
3 hard-boiled eggs cut into wedges
1/4 cup sliced pitted Kalamata olives
1/4 cup finely chopped fresh parsley
5-6 medium new potatoes (boiled and peeled)

PREPARATION:

To prepare vinaigrette: Peel the garlic and smash with the side of a chef’s knife. Using a fork, mash the garlic with 1/4 teaspoon salt in a small bowl to form a coarse paste. Whisk in 5 tablespoons oil. Add 6 tablespoons orange juice, vinegar and mustard; whisk until well blended. Taste and whisk in up to 4 tablespoons more juice to mellow the flavor; season with more salt, if desired. Set aside at room temperature.

To prepare salad:
Add beans to the steamer basket; cook until bright green and just tender, 4 to 6 minutes. Rinse in a colander with cold water until cool. Drain well. Place in a medium bowl and toss with 2 tablespoons vinaigrette.

Combine lemon juice, 2 tablespoons oil and 1/4 teaspoon salt in a sturdy resealable plastic bag; shake until the salt dissolves. Add cooked halibut and marinate for up to 20 minutes.

Arrange lettuce leaves on a large serving platter. Arrange the fish (whole or flaked into large chunks), potatoes,green beans and tomatoes on top. Drizzle with the remaining vinaigrette. Garnish with eggs, olives, parsley and pepper to taste.


Intuitively Yours,
Laurel  xoxo

Saturday, July 19, 2014

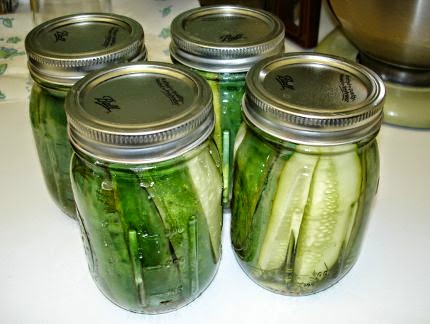
Homemade Refrigerator Pickles


If you've got a fridge and some cucumbers, zucchini, or watermelon, you can make pickles!
I love crunchy dill pickles, but conventional pickles have many harmful ingredients in them.

Pickles make great snacks, satisfying food cravings without throwing off your daily intake of calories, fats, sugars or carbohydrates. Like most fermented foods, natural pickles provide PROBIOTIC benefits. Unfortunately, most commercially sold pickle brands contain high fructose corn syrup and/or food dye.  Food manufacturers dye pickles as a marketing ploy to enhance the shelf-appeal of their product, hoping consumers will choose the brightest pickles from the supermarket shelves. A few manufacturers using turmeric to create the yellowy tinge which makes green pickles appear brighter. However, as an April 2011 article in the New York Times noted, natural food dyes are "not as bright, cheap or stable as artificial colorings, which can remain vibrant for years."

Approximately 60%-70% of all dyes used in food and textile manufacturing are what are called azo dyes, processed from industrial waste. The ingredient responsible for the yellow color in many commercial pickles is the azo dye tartrazine, made from coal-tar derivatives. Many azo dyes are known to be mutagenic, meaning they cause mutations (changes in cell DNA). The National Cancer Institute has stated that mutagenic substances are carcinogens.

For example:  Here are the ingredients in one conventional popular dill pickle brand -
Vlasic Hamburger Dill Chips Pickles: cucumbers, water, distilled vinegar, salt, calcium chloride, sodium benzoate (preservative), natural, polysorbate 80, yellow 5.


Making your own homemade refrigerator pickles is a great way to enjoy pickles without the added harmful ingredients. 

They're ridiculously easy to make and will last a few months in your fridge, without the hassle of dragging out all your canning equipment. You're basically just adding vegetables—or watermelon rinds, green beans, carrots or anything else your pickling heart desires—to a mixture of vinegar and salt; just about any vegetable can be turned into a refrigerator pickle, so don't limit yourself to pickling cucumbers only. Homemade pickles are healthy, too, if you use an organic, unpasteurized cider vinegar, such as Bragg's, that's full of immune-boosting PROBIOTICS.

The following two basic recipes are delicious in their own right, but they are also a starting place for limitless variations using different veggies and seasonings. Add more garlic, add spicy red pepper for hot pickles, or substitute other HERBS for the dill. Just take advantage of whatever ingredients you have in your garden or find at your local farmer's market.

Classic Dill Pickles (1 quart)

Ingredients:
5 medium cucumbers
1 Tablespoon pickling salt, sea salt, or kosher salt (but not iodized table salt)
1 cup cider vinegar
1 cup water
1 head dill or small bunch dill leaves
1 clove garlic (optional)
3 black peppercorns (optional)

Directions:
For the crunchiest pickles, select firm, dark-green pickling cucumbers that have not started to ripen to white or yellow. Cut them into spears or slices, as desired (left whole, they will take a long time to pickle in the fridge). To increase the crunchiness, you can sprinkle the cut cucumbers with a couple of tablespoons of salt, let them sit for 2 hours, and then rinse and drain before proceeding, but this step isn't absolutely necessary. I rarely bother with it.

Prepare a quart jar with a lid by running it through the dishwasher or washing it in very hot soapy water and letting it air-dry. Any jar with a lid will do; the wider the opening, the easier.

Place the dill in the bottom of your jar, peel and crush the garlic clove (if using), and drop that in along with the peppercorns (if using), then put in the cut cucumber. Mix the salt, vinegar, and water in a separate container, stirring until the salt is dissolved, then pour it over the cucumbers, filling the jar right to the top. If you're in a hurry to enjoy your pickles, heat the vinegar, water, and salt to a boil before pouring it over the cucumbers (just know that heating unpasteurized vinegar kills off the healthy PROBIOTIC bacteria that make pickles good for you). Pop on the lid and put the jar in the fridge.

Bread and Butter Pickles (1 quart)
Dill pickles are good, but if you like your pickles sweet and tangy, these bread-and-butter pickles fit the bill.

Ingredients:
3 cups sliced cucumbers
1 cup sliced onions (or half onions and half green pepper)
1 clove garlic, peeled and sliced (optional)
1 Tablespoon pickling salt, sea salt, or kosher salt (but not iodized table salt)
1 cup apple cider vinegar
 7/8 cup raw honey, or stevia to taste
1 Tablespoon whole mustard seeds
1 teaspoon ground turmeric
½ teaspoon celery seed
2 cloves, whole

Directions:
Prepare jar and veggies as you would for Dill Pickles. Combine the remaining ingredients in a stainless steel saucepan, bring them to a boil, and simmer until the sugar or honey is dissolved. Put the veggies into the jar and pour the vinegar mixture over them, stirring to make sure all veggies come in contact with it. Cover and refrigerate.


Recycle Your Pickle Juice!
Last, but not least: After you chase down the last pickle in the jar, STOP—don't dump that juice! It's all ready and waiting for another batch of pickles. Just slice or chop up fresh veggies and drop them into the jar. The pickle juice should completely cover the veggies. If it doesn't, take out some of the veggies or add a bit of vinegar, and shake. Screw on the lid and put it back in the fridge. Let the juice soak for a few days and then, enjoy! CONTINUE to reload the jar as long as the pickles' flavor continues to please you.


Enjoy!


Intuitively Yours,
Laurel  xxxx

Sunday, July 13, 2014

Honey Apple Crisp with Homemade Whipped Cream


Honey Apple Crisp


Ingredients:

4 cups organic peeled, cored, sliced apples (Golden Delicious, Jonathan, Granny Smith)
1/4 cup firmly packed coconut palm sugar
1 tablespoon fresh organic lemon juice
1 tsp vanilla extract
1/2 cup raw honey
1/4 cup organic butter (1/2 stick)
1/2 cup organic all-purpose flour, sifted
1/4 teaspoon Ceylon cinnamon
1/4 teaspoon sea salt
1/2 cup organic pecans, chopped

Directions:

1. Preheat oven to 375°F, and butter a 1-1/2 quart baking dish.
2. In a medium bowl, combine the apples, lemon juice, vanilla extract and honey. Toss to coat apple slices, and pour into baking dish.
3. In a small bowl, cut the butter into the 1/4 cup coconut palm sugar and flour until mixture resembles coarse crumbs. Stir in cinnamon and salt. Sprinkle mixture over apples, and top with pecans.
4. Bake in preheated 375°F oven for 30 to 40 minutes, until bubbly and brown on top. Serve warm with whipped cream on top.  (Recipe to follow)


Homemade Whipped Cream

Ingredients:
2 cups Organic heavy whipping cream, cold  (I used Organic Valley)
2 tablespoons coconut palm sugar
1 teaspoon vanilla extract


Instructions:
Place all ingredients into your blender or Magic Bullet and secure lid.  Turn on until soft peaks form. Do not over mix. Serve within two hours.


HEALTH BENEFITS & FUN FACTS
Chilled cream whips better than warm cream, at times if not chilled properly the cream may not whip. Also it renders a deeper taste. Normal creams consist of 30 percent of milk fat but heavy cream on the other hand consist of 36 percent fat. The fatty milk product ensures the production of cream, if whipped more than the required time the cream may turn into butter.


Intuitively Yours,
Laurel x0x0

Tuesday, July 8, 2014

Delicious Homemade Blueberry Breakfast Crepes


Today I was thinking about changing my usual breakfast regimen of juicing or eating oatmeal to something a little more appetizing. I realized that I haven't made my dad's blueberry crepes in a few years. The more I thought about a heaping stack of these delicious blueberry crepes covered in maple syrup, I was compelled to make a batch.  I'm happy to say that they turned out perfectly scrumptious.  I prefer my dad's recipe to conventional pancakes because they aren't like the typical heavy and doughy pancake, but light and fluffy.

My dad's blueberry crepe recipe is easy to make and you can refrigerate the leftovers or freeze them for another time. Of course, I changed the ingredients to organic, but they taste as great as the original recipe.

I'm proud to be able to share this recipe with you and I hope you enjoy it!  Thanks Dad ♥


Homemade Blueberry Breakfast Crepes

Ingredients:

1 cup organic all-purpose flour
1 1/2 cups organic milk
2 eggs
1 tablespoon olive oil or coconut oil
1 teaspoon vanilla extract
1/4 teaspoon sea salt
1 cup fresh organic blueberries (added after blending)


Directions:

Beat all ingredients in a processor until blended.  Add the blueberries.  Heat a splash of olive oil in a 6-inch skillet.  Remove from heat.  Spoon in about 2 tablespoons batter; lift and tilt skillet to spread batter.  Return to heat; when crepe begins to bubble turn it over for a few seconds.  Remove crepe.  Repeat to make 16 to 18 crepes.  Serve with 100% maple syrup and butter.


Intuitively Yours,
Laurel x0x0